
using System.Collections;
using UnityEngine;

public class Event1 : MonoBehaviour
{
    public Dialogue dialogue_1;//다이어로그1
    public Dialogue dialogue_2;//다이어로그2

    private DialogueManager theDM;
    private OrderManager theOrder;
    private PlayerManager thePlayer;// animator.getFloat "DirY"==1f;위를 바라볼때
    private FadeManager theFade;

    private bool flag;

    // Start is called once before the first execution of Update after the MonoBehaviour is created
    void Start()
    {
        theDM = FindAnyObjectByType<DialogueManager>();//다이어로그 찾아오기
        theOrder = FindAnyObjectByType<OrderManager>();//오더메니져 찾아오기
        thePlayer = FindAnyObjectByType<PlayerManager>();//플레이어 매니져 찾아오기
        theFade = FindAnyObjectByType<FadeManager>();//페이드 매니져 불러오기
    }

    private void OnTriggerStay2D(Collider2D collision)
    {
        if (!flag && Input.GetKey(KeyCode.Z) && thePlayer.animator.GetFloat("DirY") == 1f)
            //조건문 플레그가 flase이면서 z키를 입력하고 캐릭터가 보는 방향이 위일때
        {
            flag = true;
            StartCoroutine(EventCoroutine());
        }
    }
    IEnumerator EventCoroutine()
    {
        theOrder.PreLoadCharacter();
        theOrder.NotMove();

        theDM.ShowDialogue(dialogue_1);
        yield return new WaitUntil(() => !theDM.talking);

        theOrder.Move("Player", "RIGHT");
        theOrder.Move("Player", "RIGHT");
        theOrder.Move("Player", "UP");

        yield return new WaitUntil(() => thePlayer.queue.Count == 0);

        theFade.Flash();
        theDM.ShowDialogue(dialogue_2);
        yield return new WaitUntil(() => !theDM.talking);
        theOrder.Move();
    }
}
using System.Collections;
using UnityEngine;
public class TransferMap : MonoBehaviour
{
//public string transferMapName;//이동할 맵의 이름
public Transform target;
//public BoxCollider2D targetBound;
private CameraManager theCamera;
private PlayerManager thePlayer;
private FadeManager theFade;
private OrderManager theOrder;
// Start is called once before the first execution of Update after the MonoBehaviour is created
void Start()
{
theCamera = FindAnyObjectByType<CameraManager>();
thePlayer = FindAnyObjectByType<PlayerManager>();//다수객체에서 PlayerManager를 찾아온다
theFade = FindAnyObjectByType<FadeManager>();
theOrder = FindAnyObjectByType<OrderManager>();
}
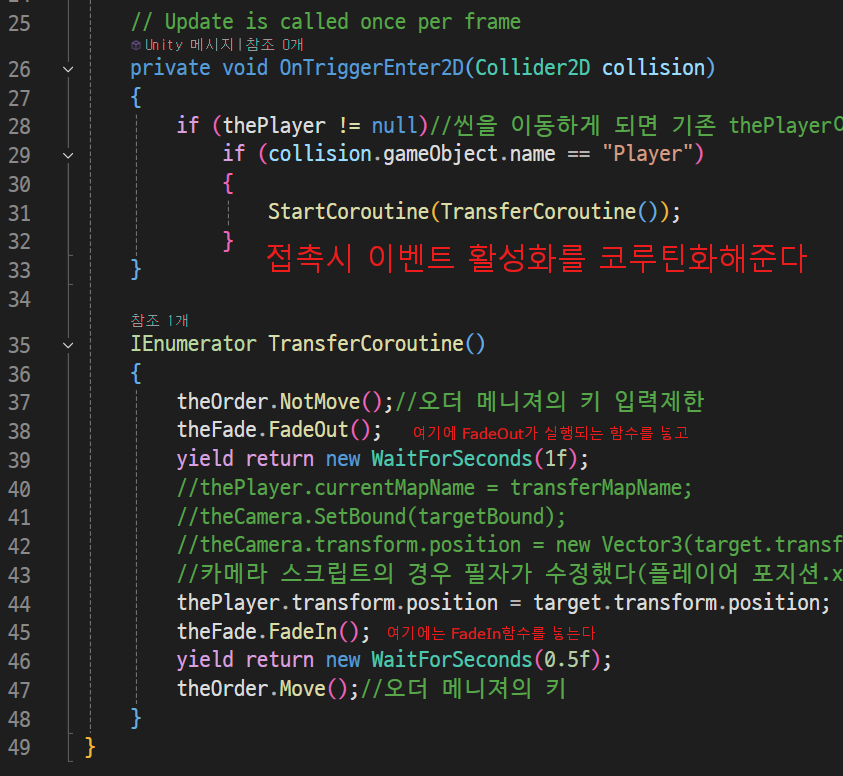
// Update is called once per frame
private void OnTriggerEnter2D(Collider2D collision)
{
if (thePlayer != null)//씬을 이동하게 되면 기존 thePlayer이 파괴되므로 다시 감지하게 했음
if (collision.gameObject.name == "Player")
{
StartCoroutine(TransferCoroutine());
}
}
IEnumerator TransferCoroutine()
{
theOrder.NotMove();//오더 메니져의 키 입력제한
theFade.FadeOut();
yield return new WaitForSeconds(1f);
//thePlayer.currentMapName = transferMapName;
//theCamera.SetBound(targetBound);
//theCamera.transform.position = new Vector3(target.transform.position.x, target.transform.position.y, theCamera.transform.position.z);
//카메라 스크립트의 경우 필자가 수정했다(플레이어 포지션.x ,플레이어 포지션.y, 카메라 포지션.z)로 이동하게 함
thePlayer.transform.position = target.transform.position;
theFade.FadeIn();
yield return new WaitForSeconds(0.5f);
theOrder.Move();//오더 메니져의 키
}
}
using System.Collections;
using UnityEngine;

public class FadeManager : MonoBehaviour
{
    public SpriteRenderer white;                                //하얀 오브젝트 연결
    public SpriteRenderer black;                                //검은 오브젝트 연결

    private Color color;                                        //컬러 변수 선언

    private WaitForSeconds waitTime = new WaitForSeconds(0.01f);//코루틴 대기 시간을 변수화

    public void FadeOut(float _speed = 0.02f)
    {
        StopAllCoroutines();
        StartCoroutine(FadeOutCoroutine(_speed));
    }


    IEnumerator FadeOutCoroutine(float _speed)
    {
        color = black.color;

        while (color.a < 1f)
        {
            color.a += _speed;
            black.color = color;
            yield return waitTime;
        }
    }

    public void FadeIn(float _speed = 0.02f)
    {
        StopAllCoroutines();
        StartCoroutine(FadeInCoroutine(_speed));
    }

    IEnumerator FadeInCoroutine(float _speed)
    {
        color = black.color;

        while(color.a > 0f)
        {
            color.a -= _speed;
            black.color = color;
            yield return waitTime;
        }
    }

    public void Flash(float _speed = 0.1f)
    {
        StopAllCoroutines();
        StartCoroutine(FlashCoroutine(_speed));
    }

    IEnumerator FlashCoroutine(float _speed)
    {
        color = white.color;

        while (color.a < 1f)
        {
            color.a += _speed;
            white.color = color;
            yield return waitTime;
        }
        while (color.a > 0f)
        {
            color.a -= _speed;
            white.color = color;
            yield return waitTime;
        }
    }

    public void FlashOut(float _speed = 0.02f)
    {
        StopAllCoroutines();
        StartCoroutine(FlashOutCoroutine(_speed));
    }


    IEnumerator FlashOutCoroutine(float _speed)
    {
        color = white.color;

        while (color.a < 1f)
        {
            color.a += _speed;
            white.color = color;
            yield return waitTime;
        }
    }

    public void FlashIn(float _speed = 0.02f)
    {
        StopAllCoroutines();
        StartCoroutine(FlashInCoroutine(_speed));
    }

    IEnumerator FlashInCoroutine(float _speed)
    {
        color = white.color;

        while (color.a > 0f)
        {
            color.a -= _speed;
            white.color = color;
            yield return waitTime;
        }
    }
}
이번 강좌는 페이드와 플레시 연출을 공부할 것이다
위 스크린샷을 보면 단번에 이해가 될 것이다
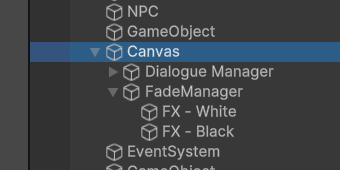
일단 Canvas에 빈 오브젝트를 만들어주고 이름을 FadeManager로 만들어 준다
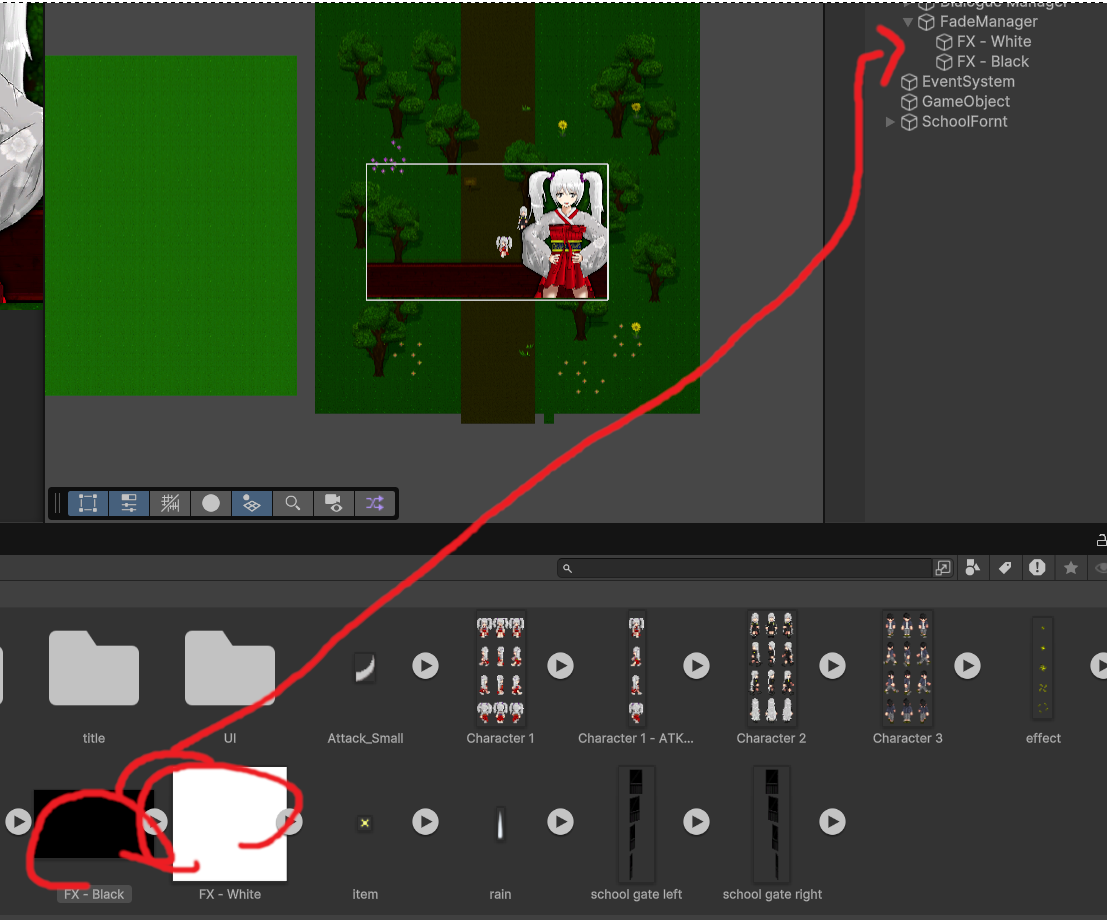
FX-Black와 FX-White를 넣어주자
그 뒤 메인카메라를 전부 덮을 만큼 사이즈를 적당히 키워준다
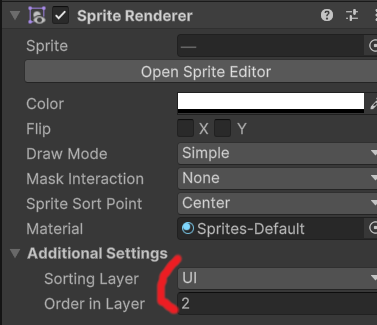
그 뒤 두 파일을 한꺼번에 선택해서 Sorting Layer을 UI 레이어로 맞춰주고 Order In Layer을 2로 맞춰준다
카메라 스크린에 나오는 우선 순위를 제일 높게 맞춰주는 것이다
카메라 스크린 우선 순위가 제일 높다면 카메라를 가리는게 아닌가 싶을 탠데 그 점은
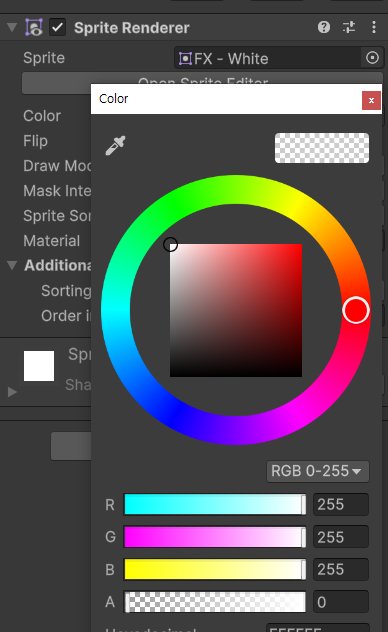
인스펙터에 들어가서 이미지의 a(알파)값을 0으로 맞춰 투명하게 만들어 준다
우리는 이 알파값을 이용해서 페이트 인 아웃 연출에 적절하게 활용해 줄 것이다
이제 스크립트를 작성하자
이름은 FadeManager로 한다
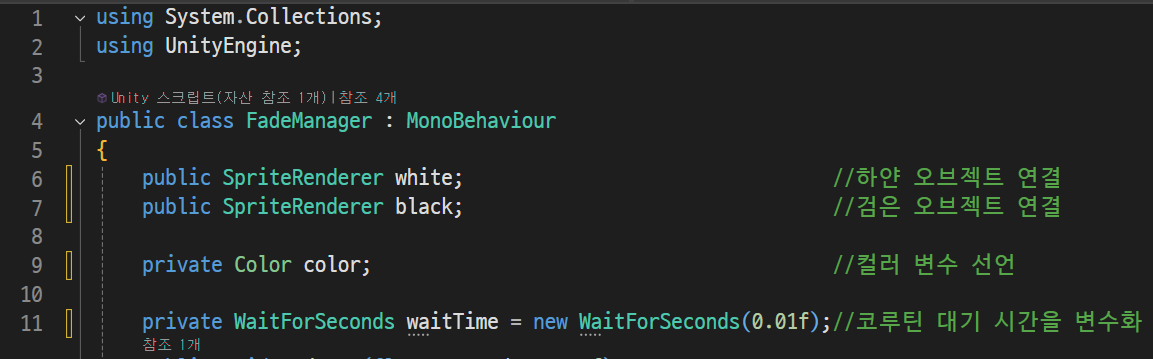
변수를 이렇게 작성해준다
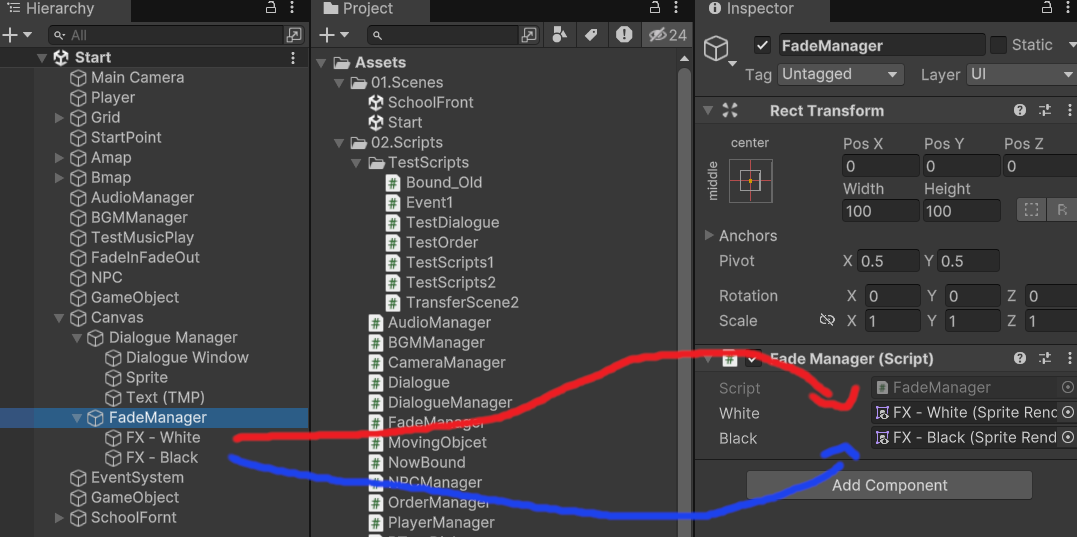
FX-white와 FX-black는 인스펙터에 위 변수에 맞게 연결해 준다
위에 Color color을 변수로 선언해준게 있는데 이것은 이미지를 관리하는 코드다 없으면 안된다
그리고 마지막에
private WaitForSeconds waitTime = new WaitForSeconds(0.01f)는 1초를 기준으로 코루틴의 대기시간을 설정해 주는 것이다
이걸 변수로 선언해주면 일일이 칠 필요도 없고 리소스 적으로 관리가 편하다고 한다
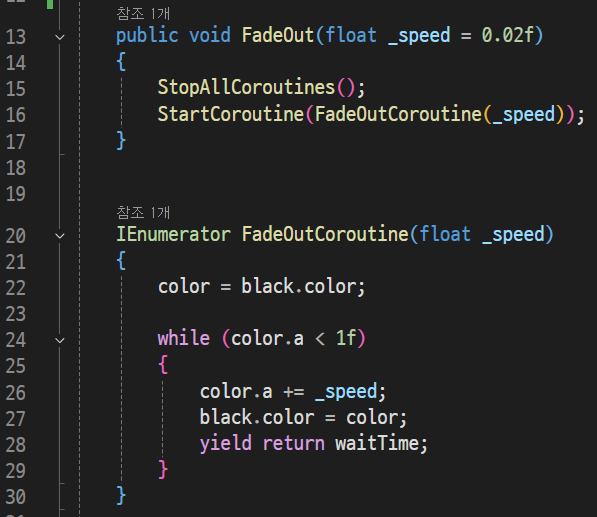
이제 FadeOut를 작성한 것을 보기로 하자
public void FadeOut로 코드를 작성하고 옆에 괄호를 열고 (float _speed = 0.02f)로 인자를 받아왔다
그 뒤
함수로 작성된 코드를 보면
다른 코루틴과 중복이 안되게 StopAllCoroutines();를 먼저 작성했다
그뒤 StartCorouTine(FadeOutCoroutine(_speed));로 코루틴을 실행했다
이제 코루틴 함수를 설명한다
일단 제일 먼저 컬러를 조절하기 위해서
color = black.color;로 위에 변수에 잡아준 검은색 이미지를 받아왔다
그뒤
while문으로 조건을 color.a <1f로 작성해서
컬러의 알파값이 1보다 작으면으로 조건을 잡았다
그뒤 아래 함수를 작성하고
color.a += _speed;를 작성하여 계속해서 위에 선언한 인수를 더해준다
그리고 바로 컬러의 알파값에 반영되도록 했고
코루틴을 정지해주는
yield return waitTime;를 사용해 줬다
이걸로 FadeOut가 모두 작성되었다
이걸 실행해주면 화면이 어두워 진다
이제 FadeIn을 설명해주겠다
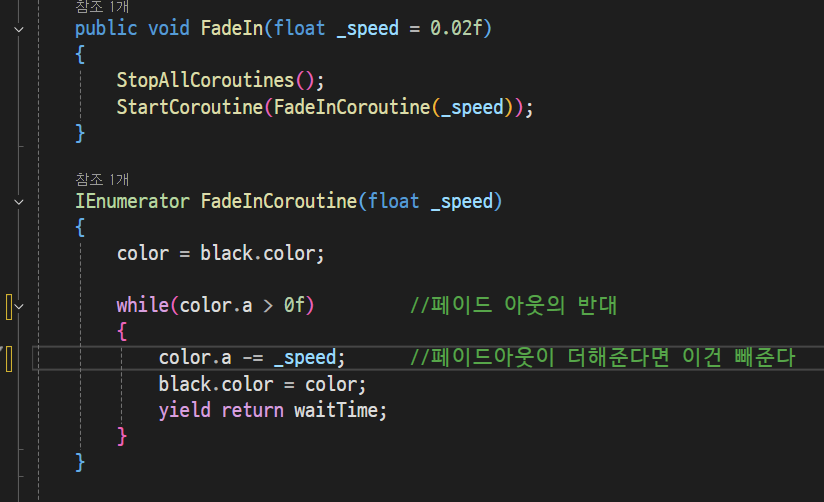
눈치가 빠르다면 알게될 것이다
while문으로 이번에는 0보다 크다면이라는 조건문을 달아줬다
그리고 아래에
color.a -= _speed;를 작성해서 이번에는 실시간으로 알파값을 빼주는 코드를 작성했다
그뒤 실시간으로 반영되어서 이번에는 화면이 검은색에서 투명해지는 것을 만들어 주었다
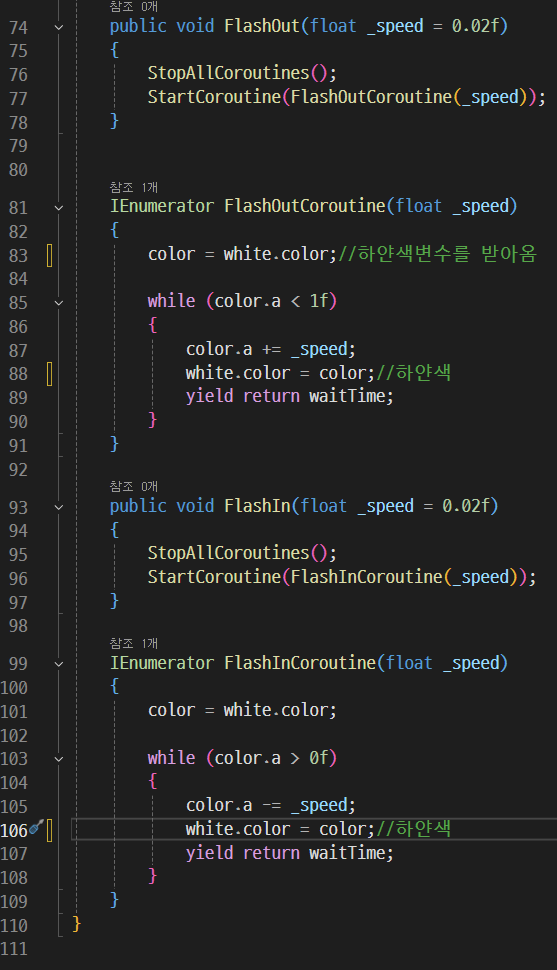
이번에는 FlashIn, FlashOut를 설정해준다
여기서는 black를 white로 변경하고 이름만 살짝 바꿔주면 된다
이 효과는 흰색섬광을 표현 한 것이다
이제 흰색섬광을 표현 한 것을 응용해서 번개 효과를 낸다
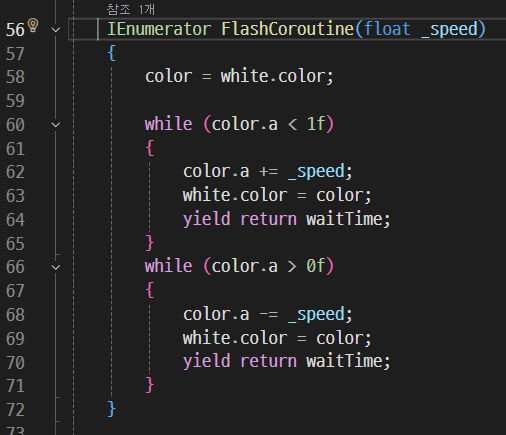
간단하게 번쩍하고 순간적으로 밝아졌다 어두워지는 코드를 작성해준 것이다
그냥 FlashIn과 FlashOut를 붙여넣어주면 끝난다
이제 이걸 게임에 응용해 본다
맵에서 특정 다른 맵을 이동하는 스크립트를 열어보자
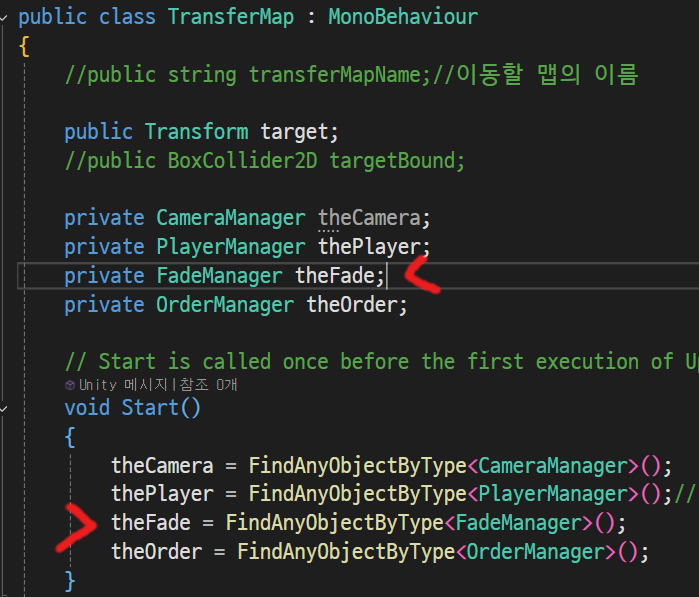
그리고 스크립트를 열어서 FadeManager을 선언하고 불러와준다
미리 작성한 스크립트를 보자
일단 지난번에 NotMove와 Move가 만들어져서
이번에 필자는 theOrder을 불러와서 코드를 넣어주었다
이렇게 넣어주면 도중에 움직이는 일이 없어진다
그리고 FadeOut와 FadeIn을 보고 짧지만 대기 시간을 주었다
이유는 플레시가 일어나는데 움직이면 어색하니까 이다
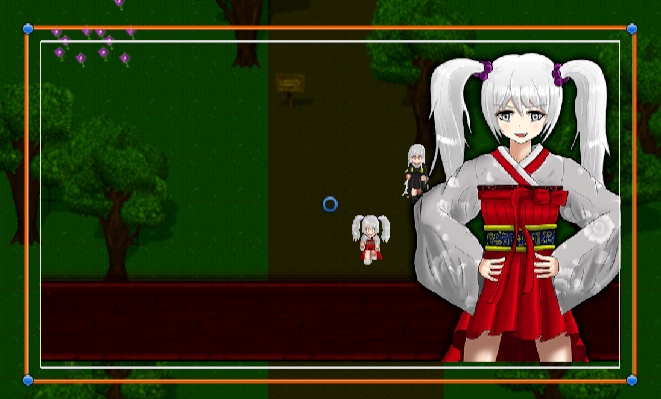
이제 효과를 적용하면
이렇게 효과가 연출된다
살짝 작업하면서 그 멋진 연출이 이렇게 간단하게 되는것에 다들 의아해 할건데 그맘 이해한다
필자도 공부하면서 생각보다 간단해서 놀랬다
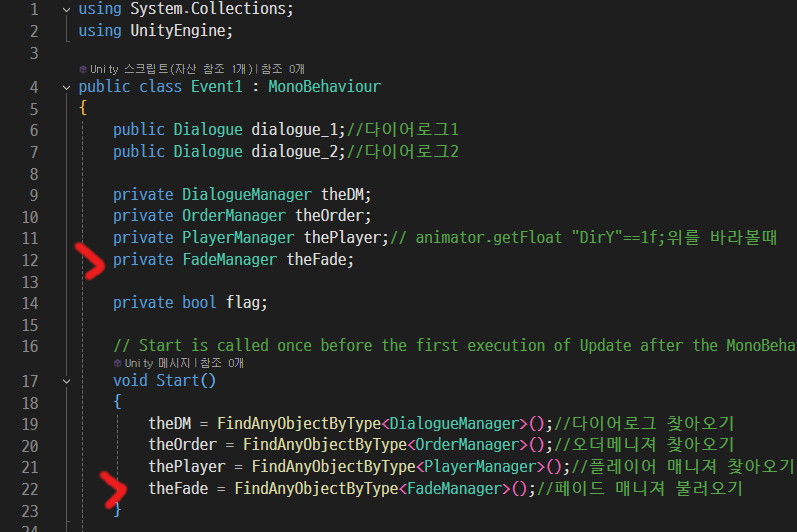
이번에는 지난번에 사용한 Event1의 스크립트를 불러와서 이렇게 장착해준다
이제 Flash효과를 사용해보자
코드를 이렇게 보강해주자
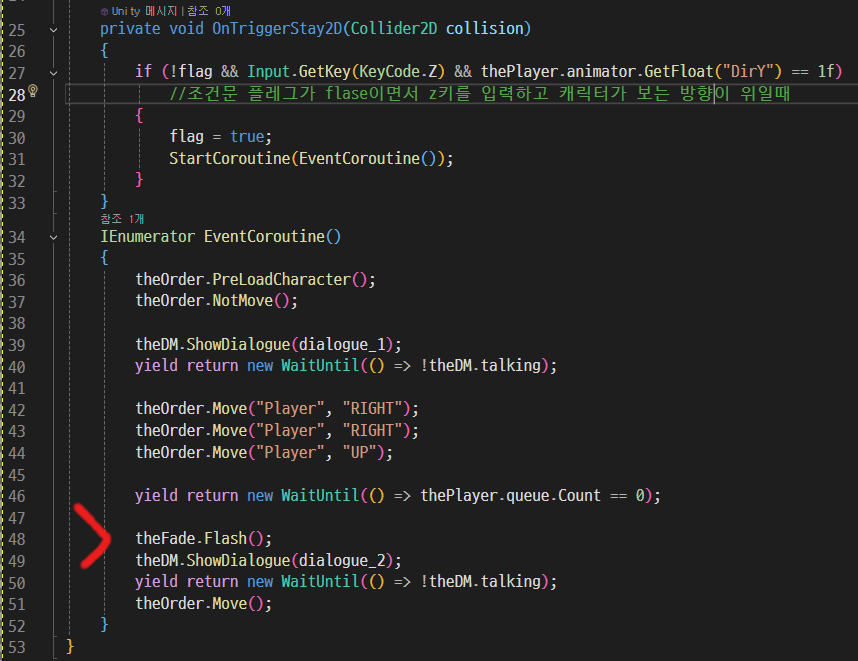
그럼 이렇게 대사를 치다가 번개가 번쩍이는 연출이 나올 것이다
오늘 강좌는 이걸로 종료합니다
ps
이제 곧 공부하기 빡센 데이터매니저가 올 겁니다
단단히 각오해주세요!
'쯔꾸르식 유니티 게임 공부' 카테고리의 다른 글
| 17.데이터매니져(Scritps사용) (0) | 2025.02.04 |
|---|---|
| 16.날씨효과 (0) | 2025.02.04 |
| 14.이벤트 구현하기 (0) | 2025.01.23 |
| 13.대화시스템 (0) | 2025.01.21 |
| 12.NPC 충돌방지(Box콜라이더 이동) (0) | 2025.01.16 |